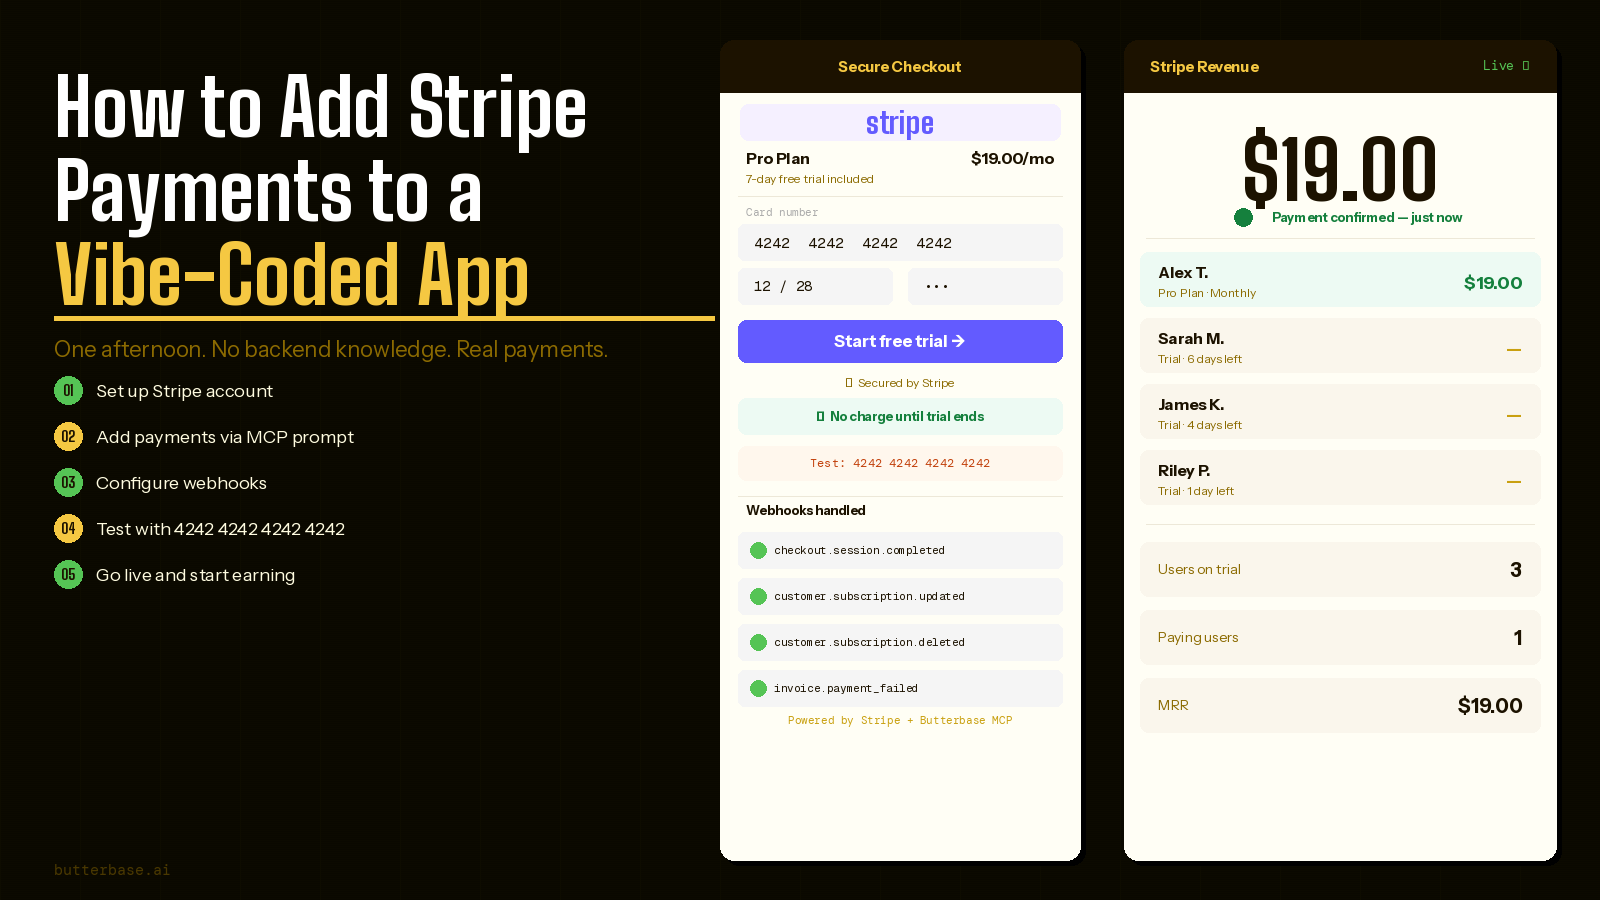
You built the app. It works. People are using it. Now you want to charge for it.
Adding payments is the step most vibe coders put off longer than they should. It sounds complicated - payment processing, webhooks, subscription logic, PCI compliance, tax handling. But in 2026, Stripe has made this straightforward enough that you can add a complete, production-ready payment system to your app in a single afternoon, without writing backend code yourself.
This guide covers everything - from setting up your Stripe account and writing the right prompts, to handling edge cases, going live safely, and understanding what actually happens when money moves through your product.
Why Stripe and not something else
Before getting into the how, it is worth understanding why Stripe is the default choice for vibe coders and indie founders.
Stripe charges nothing until you earn money. No monthly fee, no setup cost, no minimum volume. You pay 2.9% plus $0.30 per transaction. On a $19 subscription, Stripe takes $0.85 and you keep $18.15. On a $49 subscription, Stripe takes $1.72 and you keep $47.28. There is zero financial risk to adding Stripe before you have a single paying customer.
The documentation is the best in the industry. When AI tools integrate Stripe, they are working from the same documentation developers have relied on for years. This means the integration your AI tool produces is reliable and follows established patterns that Stripe actively supports.
Stripe's hosted checkout handles everything complex. Card validation, 3D Secure authentication, fraud detection, PCI compliance - all of this happens inside Stripe's hosted checkout page. You never touch a card number. You never store sensitive payment data. Stripe manages it, and they do it for millions of transactions every day.
The ecosystem is complete. Subscriptions, one-time payments, coupons, invoicing, customer portals, tax collection, payouts - it is all there. You will not need to switch payment providers as your product grows.
The main alternative worth knowing is Paddle. Paddle acts as the merchant of record, meaning they handle VAT and sales tax compliance on your behalf. If you are selling internationally and concerned about tax complexity from day one, Paddle is worth considering. But for most early-stage products, Stripe is the right starting point.
Understanding how Stripe payments actually work
Before writing prompts, it helps to understand what is actually happening when a user pays. Most vibe coders treat this as a black box, which leads to problems when things go wrong.
The payment flow:
- Your app creates a checkout session on your server by calling Stripe's API with the price, the customer's email, and the URLs to redirect to after success or cancellation
- Stripe returns a checkout URL - a hosted page on Stripe's domain
- Your app redirects the user to that URL
- The user enters their card details on Stripe's page - your app never sees this data
- Stripe processes the payment and redirects the user back to your app's success URL
- Stripe simultaneously sends a webhook event to your server confirming the payment
The redirect back to your app is not proof of payment. A user could manually navigate to your success URL without paying. The webhook is the real confirmation - it comes directly from Stripe's servers and should be the only thing that triggers account activation.
This distinction matters because it is the source of the most common payment bug: apps that activate accounts based on the redirect instead of the webhook, which either breaks for slow connections or can be exploited.
Subscription lifecycle:
A Stripe subscription goes through these states:
trialing- user is in the free trial periodactive- subscription is paid and currentpast_due- a payment failed, Stripe is retryingcanceled- subscription has been cancelledunpaid- all retry attempts failed
Your database needs to store and respond to each of these states. A user in past_due should still have access (Stripe is retrying their payment) but you should prompt them to update their card. A user in canceled should retain access until current_period_end, then lose access.
Webhooks: Webhooks are HTTP POST requests that Stripe sends to your server when something happens - a payment succeeds, a subscription renews, a card is declined. Your app needs to receive these, verify they genuinely came from Stripe (using a signing secret), and respond to them. The most important webhooks to handle are checkout.session.completed, customer.subscription.updated, customer.subscription.deleted, invoice.payment_succeeded, and invoice.payment_failed.
Step 1 - Set up your Stripe account properly
Creating a Stripe account takes five minutes. Configuring it correctly takes a bit longer and is worth doing before writing any prompts.
Create your account: Go to stripe.com and sign up. Verify your email. Do not enter banking details yet - you are in test mode and no real money will move.
Get your API keys: Dashboard → Developers → API Keys. Copy your Publishable key (starts with pk_test_) and Secret key (starts with sk_test_). The secret key should never be visible in frontend code or committed to GitHub.
Create your product and price: Rather than having the AI tool create these programmatically, create them manually in the Stripe dashboard first. This gives you a stable Price ID that you can reference reliably.
- Dashboard → Product Catalog → Add product
- Name your product (e.g. "Monthly subscription")
- Add a recurring price - set the amount and currency
- Click Save and copy the Price ID - it starts with
price_
Configure the customer portal: Dashboard → Settings → Billing → Customer portal. Enable the portal and check "Allow customers to cancel subscriptions" and "Allow customers to update payment methods". This is the self-service portal where your users will manage their subscription. Stripe hosts it, which means you get a polished subscription management experience with no additional work.
Set up webhook signing: Dashboard → Developers → Webhooks → Add endpoint. Enter your endpoint URL (e.g. https://yourapp.butterbase.ai/api/webhooks/stripe), select events under checkout, customer.subscription.*, and invoice.*, then copy the Signing secret - it starts with whsec_.
Step 2 - Write the payment prompt
This is where most of the work happens. The quality of your prompt determines how much the AI gets right on the first pass. The key is to be specific about every edge case you can think of before you start. Every vague assumption in your prompt becomes a debugging session later.
Here is a complete prompt template. Copy it, fill in the bracketed sections, and paste it into Claude Code or Cursor:
"Add Stripe subscription payments to this app. Use Butterbase as the backend via MCP.
Credentials (store these as environment variables, never hardcode them): Stripe publishable key, Stripe secret key, Stripe Price ID, Stripe webhook signing secret.
Database changes needed: add these fields to the users table - stripe_customer_id (text), subscription_status (text, default 'trial'), subscription_id (text), trial_ends_at (timestamp), current_period_end (timestamp). When a new user signs up, set trial_ends_at to 7 days from now and subscription_status to 'trial'.
Access control: users with subscription_status of 'trial' (and trial_ends_at in the future) or 'active' have full access. Users in 'past_due' have full access but see a banner asking them to update their payment method. Users in 'canceled' retain access until current_period_end, then see the paywall. All other users see the paywall.
Checkout flow: add a paywall component that appears when a user's access has expired. The paywall shows the product name, price, and a clear 'Subscribe for $[price]/month' button. When clicked, create a Stripe checkout session on the server and redirect the user to Stripe's hosted checkout page. Pass the user's email to Stripe so it pre-fills the checkout form. Set success and cancel URLs accordingly.
Webhook handler at /api/webhooks/stripe: verify the webhook signature using the signing secret before processing any event. Handle checkout.session.completed, customer.subscription.updated, customer.subscription.deleted, invoice.payment_failed, and invoice.payment_succeeded - updating the database accordingly.
Billing page at /billing: show the user's current plan, next billing date, and a 'Manage subscription' button that opens a Stripe customer portal session.
Trial reminder: 3 days before trial_ends_at, send the user an email with the price and a direct link to checkout."
This prompt is deliberately long. The specificity prevents the AI from making assumptions about edge cases that later become bugs. The most important parts are the access control logic (what each subscription status means) and the webhook handler (what each event should do to the database).
Step 3 - Add the pricing page
The pricing page is not just a conversion tool - it is a GEO signal. When someone asks an AI tool "how much does [your product] cost" or "is there a free trial for [your product]", a well-structured pricing page with a FAQ section is what gets cited.
The hero should have a clear headline about value delivered, a one-sentence subheadline on who it is for, and a trust signal if available. The pricing card should show the plan name, the price, "7-day free trial, then $[price]/month - cancel anytime", a list of 6 benefits phrased as outcomes (not features), a "Start free trial" CTA, and "No credit card required" small text.
Include a FAQ section at the bottom with these exact questions: Is there a free trial? Do I need a credit card to sign up? How much does it cost after the trial? Can I cancel anytime? What happens to my data if I cancel? Do you offer refunds? What payment methods do you accept? Is there an annual plan? Do you offer discounts for students or non-profits?
The FAQ section is the highest-value part of the pricing page for GEO. Every one of these questions is something potential customers ask AI tools before deciding to sign up. AI tools pull directly from FAQ sections when answering these queries - a clearly written answer here gets cited.
Step 4 - Test every scenario before going live
Most payment bugs are discovered by real customers at the worst possible moment. Testing thoroughly in test mode takes about 30 minutes and prevents a lot of damage.
Stripe test cards - use any future expiry date and any 3-digit CVV:
4242 4242 4242 4242- successful payment4000 0000 0000 0002- payment declined4000 0000 0000 9995- insufficient funds4000 0025 0000 3155- 3D Secure required4000 0000 0000 0069- card expired
Test scenario 1 - Successful new subscription. Sign up, trigger the paywall, click Subscribe, enter 4242 4242 4242 4242, complete checkout. Verify you are redirected to the success page then dashboard, and that the user's subscription_status is 'active' in the database.
Test scenario 2 - Failed payment. Trigger the paywall on a test account. Enter declined card 4000 0000 0000 0002. Verify the payment fails gracefully with a clear error message, the user is not activated, and they can try again.
Test scenario 3 - Trial expiry. Create a test account. In the Stripe dashboard, find the test subscription and use "Skip trial" to advance the trial end date. Verify the paywall appears, all user data is still present (just inaccessible), and the trial reminder email was sent 3 days before expiry.
Test scenario 4 - Subscription cancellation. Subscribe, open the customer portal, cancel. Verify you still have access until current_period_end. Then advance the period end in Stripe and verify access is removed and all data is still in the account.
Test scenario 5 - Webhook delivery. In Stripe dashboard, go to Developers → Webhooks → your endpoint, click "Send test webhook" for each event type, and verify each one is received and logged correctly with no signature verification failures.
If any scenario fails, describe the exact failure to your AI tool. Be specific: "When I enter the declined test card and complete the checkout attempt, the app redirects to the success page instead of showing an error. It should show a message saying the payment was declined and let me try again."
Step 5 - Handle the edge cases nobody talks about
Most payment guides stop at the happy path. Here are the edge cases that trip up real products.
Duplicate webhook events. Stripe occasionally sends the same webhook event more than once. Tell your AI tool: "In the webhook handler, before processing any event, check if an event with this Stripe event ID has already been processed by storing event IDs in the database. If the ID already exists, return 200 without processing."
Users who sign up after cancelling. A user who cancels and then re-subscribes should go through the normal checkout flow, but you do not want duplicate Stripe customers. Tell your AI tool: "When creating a Stripe checkout session, check if the user already has a stripe_customer_id in the database. If they do, pass that customer ID to the checkout session so Stripe reuses the existing customer record."
The webhook arrives before the redirect. Sometimes Stripe's webhook fires and your server processes it before the user's browser has been redirected back to your success page. Tell your AI tool: "On the payment success page, if the user's subscription_status is not yet 'active' (because the webhook may still be processing), show a 'Confirming your payment...' message and poll the status every 2 seconds for up to 30 seconds."
Users on mobile who close the browser during checkout. If a user completes payment but closes their browser before being redirected back, the webhook will still fire and their account will be activated - but they may not know it. Tell your AI tool: "If a user signs in and their stripe_customer_id exists but their subscription_status is not 'active' or 'trial', make a direct API call to Stripe to check their subscription status and update the database."
Refund handling. When you refund a payment in the Stripe dashboard, Stripe fires a charge.refunded event. Tell your AI tool: "Handle the charge.refunded webhook event. If the refund covers the full amount of the most recent invoice, set the user's subscription_status to 'canceled' and current_period_end to today."
Step 6 - Go live
When every test passes, switching to live mode takes about ten minutes.
Switch your API keys. In Stripe dashboard, toggle from Test to Live mode. Developers → API Keys → copy live publishable and secret keys (start with pk_live_ and sk_live_). Tell your AI tool to update the keys, stored as environment variables only.
Create a new webhook endpoint for live mode. The test webhook only receives test events. Create a separate webhook in live mode with the same URL and events, then copy the new signing secret and update it.
Verify your products exist in live mode. Products created in test mode do not carry over. Create your product and pricing in live mode and update the Price ID in your environment.
Make one real test transaction. Subscribe with your own card, verify the full flow works, then immediately cancel through the customer portal and refund yourself. This costs nothing but confirms the live integration end to end.
Connect your bank account. Dashboard → Settings → Payouts → Add bank account. Stripe payouts arrive on a 2-day rolling basis by default - money from a Monday payment arrives Wednesday.
Step 7 - After launch - monitoring and optimisation
Once payments are live, there are a few things worth tracking.
Trial to paid conversion rate. Stripe → Reports → Revenue. For a typical SaaS product, 15-25% trial conversion is healthy. If you are below 10%, the problem is usually one of three things: the product doesn't deliver on the promise during the trial, the trial is too short, or the paywall appears too abruptly.
Failed payment recovery. Stripe's Smart Retries automatically retries failed payments at optimal times. Make sure it is enabled in Settings → Billing → Subscriptions. Also check how many subscriptions are sitting in past_due - these are users who want to pay but couldn't. A personal email recovers a surprising number.
Churn analysis. Every user who cancels is a data point. Emailing every churned user personally in the first few weeks tells you more about what needs to change than any analytics tool.
Revenue recognition. Stripe Revenue Recognition automatically handles accrual accounting for subscription revenue. Useful if you are ever asked about MRR by investors.
Pricing strategy in practice
Adding Stripe is also a moment to think carefully about pricing. The number you launch with has more impact than most founders expect.
The psychological anchor effect. When there is only one pricing option, users evaluate whether the price is worth it. When there are two or three options, users compare them to each other instead of evaluating absolute value. For an early-stage product with one clear use case, a single price often converts better because it removes the decision.
Price for your best customer, not your most cautious one. Most vibe-coded SaaS products launch at $9 or $12 per month because it feels safer. The users who pay $9 per month are often lower-quality customers - more likely to churn, less likely to give useful feedback. Price for the customer who genuinely values what you built. $29 or $49 is more appropriate for most productivity or business tools than $9.
The right time to raise prices. Raise your price when less than 20% of prospects push back on it. If everyone you talk to accepts the price without hesitation, you are almost certainly underpriced.
Annual plans are underused. Annual subscribers churn at roughly a third the rate of monthly subscribers, and the upfront cash helps a bootstrapped business significantly. Once you have 20-30 monthly subscribers, add an annual option at 20% off and announce it to existing subscribers.
Frequently asked questions
No. You can connect a personal bank account for payouts. You will need to provide identity verification to Stripe before your first payout, but this is a standard KYC process and costs nothing. Consult a local accountant about when forming a legal entity makes sense for your situation.
Stripe is available in 46+ countries as of 2026. Check stripe.com/global for the current list. If Stripe is not available in your country, Paddle and Lemon Squeezy are the most widely-used alternatives and work similarly for vibe-coded apps.
This depends on where you and your customers are located. If you are selling to EU customers, you may be required to collect VAT. Stripe Tax (0.5% additional fee) handles this automatically. For most early-stage products selling primarily in the US, this is not an immediate concern - but it is worth understanding before you have a large number of international customers.
Stripe processes payments on your behalf - you are the merchant of record, responsible for tax compliance. Paddle acts as the merchant of record themselves, handling VAT and sales tax collection and remittance for you. If international tax compliance is a priority from day one, Paddle simplifies it. Otherwise Stripe is more flexible and widely supported.
Yes. A free plan is a legitimate user acquisition strategy if the free tier is meaningfully limited and the paid tier solves a clear problem free users hit. Tell your AI tool the specific feature or usage limits for the free tier and it will implement the access control logic accordingly.
Stripe has 99.99%+ uptime historically. In the extremely unlikely event of an outage, existing subscribers retain access since your database controls access, not Stripe in real time. New subscribers would not be able to pay until service resumed. Stripe's status page (status.stripe.com) provides real-time uptime information.
Yes, using a one-time payment instead of a subscription. Lifetime deals are a common early customer acquisition strategy - offering a one-time fee that grants permanent access. They are useful for generating upfront revenue and a loyal early user base, but can devalue the product if overdone. Use Stripe Payment Intents instead of subscriptions for this option.
Refunds are processed through the Stripe dashboard. Go to Payments → find the charge → click Refund. You can refund the full amount or a partial amount. Stripe returns the processing fee if you refund within a certain period. A common policy for early-stage SaaS is a 7-day money-back guarantee - it reduces purchase hesitation more than it increases refund rates.